Fuego Quickstart Guide
Note: this is the quickstart guide. More details and explanations can be found on the Installing Fuego page.
Overview [edit section]
The overview of the steps is:- 1. install pre-requisite software
- 2. download the fuego repository
- 3. build your fuego container
- 4. start the container
- 5. access the interface
- 6. add your board to fuego
- 7. run a test
These steps are described below.
Install pre-requisite software [edit section]
To retrieve the fuego software and create the docker image for it, you need to have git and docker installed on your system.On Ubuntu, try the following commands:
$ sudo apt install git docker.io
Download, build, start and access [edit section]
To accomplish the last 6 steps, do the following from a Linux command prompt:
$ git clone https://bitbucket.org/fuegotest/fuego.git
$ cd fuego
$ ./install.sh
$ ./start.sh
$ firefox http://localhost:8090/fuego
The fourth step (with ./install.sh) will take some time - about 45 minutes on my machine. This is the main step that builds the Fuego docker container.
When you run the 'start.sh' script, the terminal where this is run will be placed at a shell prompt, as the root user, inside the docker container. The container will run until you exit this shell. You should leave it running for the duration of your testing.
NOTE: If you are experimenting with the unreleased version of Fuego in the 'next' branch, then please replace the 'git clone' command in the instructions above with these:
- git clone -b next https://bitbucket.org/fuegotest/fuego.git
On the last step, to access the Fuego interface you can use any browser - not just Firefox. By default the Fuego interface runs on your host machine, on port 8090, with URL path "/fuego".
In your browser, you should see a screen similar to the following:
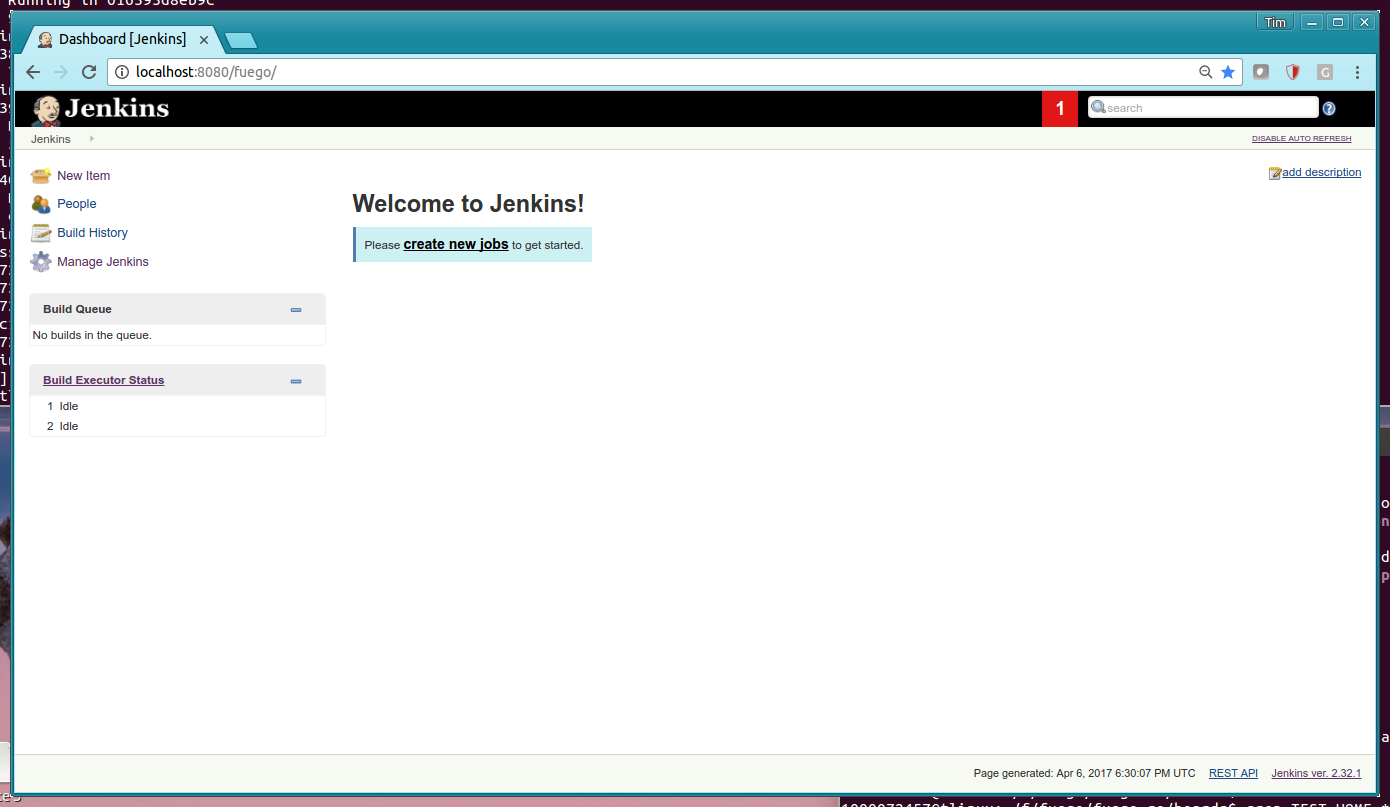
We will now add items to Fuego (and this screen) so you can begin testing.
Add your board to fuego [edit section]
To add your own board to Fuego, there are three main steps:- 1. create a test directory on the target
- 2. create a board file (on the host)
- 3. add your board to the Jenkins interface
You can find detailed instructions for adding a board at: Adding a board
However, here is a quick list of steps you can do to add a your own board, and a sample 'docker' board to Fuego:
Create a test directory on your board [edit section]
Login to your board, and create a directory to use for testing:$ ssh root@your_board <board>$ mkdir /home/a <board>$ exit
If not using ssh, use whatever method you normally use to access the board.
Create board file [edit section]
Now, create your board file. The board file resides in <fuego-dir>/fuego-ro/boards, and has a filename with the name of the board, with the extension ".board".Do the following:
 $ cd fuego-ro/boards
 $ cp template-dev.board myboard.board
 $ vi myboard.board
Edit the variables in the board file to match your board. Most variables can be left alone, but you will need to change the IPADDR, TOOLCHAIN and ARCHITECTURE variables, and set the BOARD_TESTDIR to the directory you just created above.
For other variables in the board file, or specifically to use a different transport than SSH, see more complete instructions at: Adding a board
Add boards to the Jenkins interface [edit section]
Finally, add the board in the Jenkins interface.In the Jenkins interface, boards are referred to as "Nodes".
At the container shell prompt, run the following command:
(container prompt)$ ftc add-nodes -b myboard docker
This will add your board as a node, as well as a 'docker' node in the Jenkins interface.
Install a toolchain [edit section]
If you just wish to run experiment with Fuego, without installing your own board, you can use the existing 'docker' board. This will run the tests inside the docker container on your host machine. This requires little setup, and is intended to let people try Fuego to see how the interface and tests work, without having to set up their own board.If you are running an ARM board with a Debian-based distribution on it, you can install the Debian ARM cross-compilers into the docker container with the following command (inside the container):
(container prompt)$ /fuego-ro/toolchains/install_armhf_toolchain.sh
If you are installing a some other kind of board (different architecture, different root filesystem layout, or different shared library set), you will need to install a toolchain for your board inside the docker container.
Please follow the instructions at: Adding a toolchain to do this.
Now select some tests [edit section]
In order to execute tests using the Jenkins interface, you need to create Jenkins "jobs" for them. You can do this using the 'ftc add-jobs' command.These commands are also executed at the shell prompt in the docker container.
You can add jobs individually, or you can add a set of jobs all at once based on something called a 'testplan'. A testplan is a list of Fuego tests with some options for each one. You can see the list of testplans in your system with the following command:
(container prompt)$ ftc list-plans
To create a set of jobs for the 'docker' board on the system, do the following:
(container prompt)$ ftc add-jobs -b docker -p testplan_docker
To create a set of jobs for your own board (assuming you called it 'myboard'), do the following:
(container prompt)$ ftc add-jobs -b myboard -p testplan_smoketest
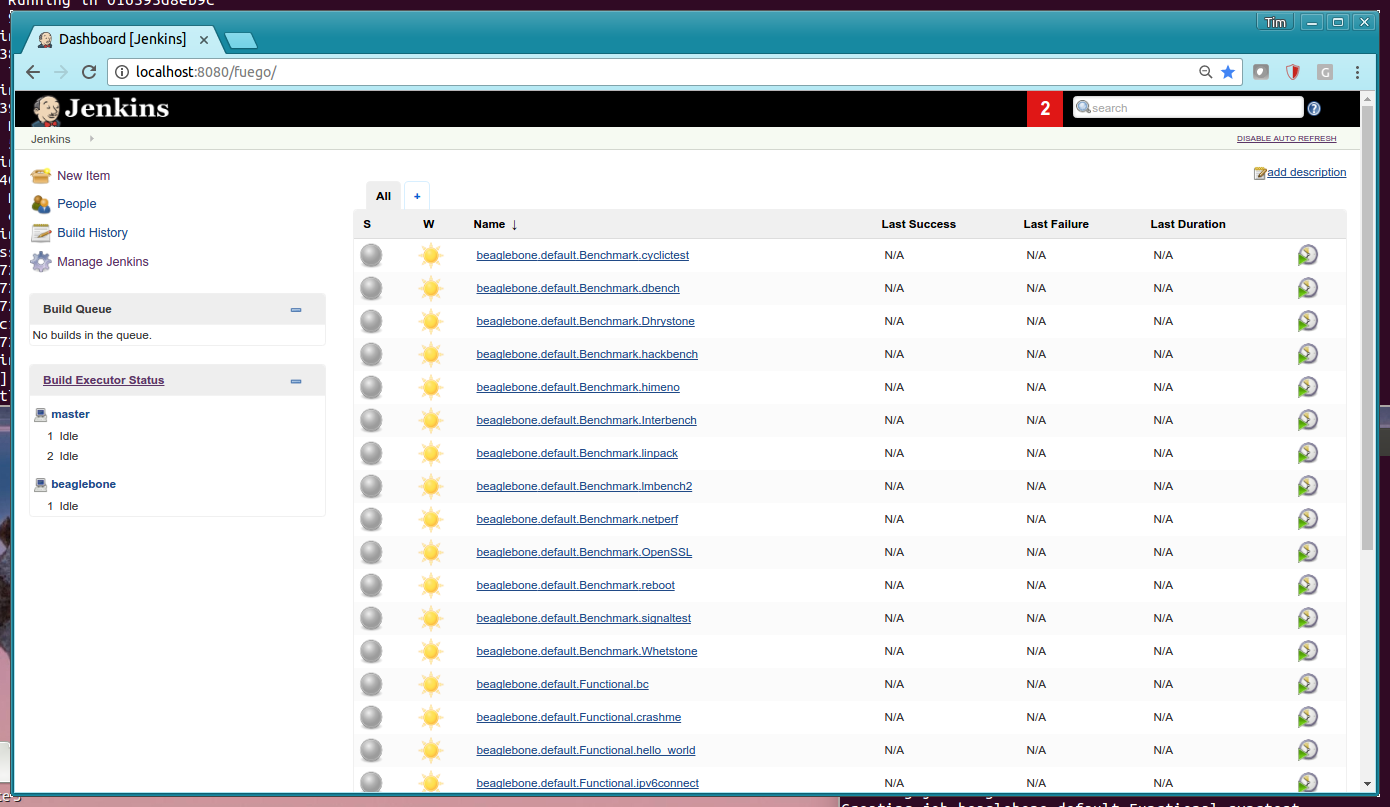
The "smoketest" testplan has about 20 tests that exercise a variety of features in a Linux system. After running these commands, a set of jobs will appear in the Jenkins interface.
Once this is done, your Jenkins interface should look something like this:
Run a test [edit section]
To run a job manually, you can do the following:- Go to the Jenkins dashboard (in the main Jenkins web page),
- Select the job (which includes the board name and the test name)
- Click “Build job” (Jenkins refers to running a test as "building" it.)
You can also click on the circle with a green triangle, on the far right of the line with the job name, in the Jenkins dashboard.
When the test has completed, the status will be shown by a colored ball by the side of the test in the dashboard. Blue means success, red means failure, and grey means the test did not complete (was not run or was aborted). You can get details about the test run by clicking on the link in the history list.
Additional Notes [edit section]
Other variables in the board file [edit section]
Depending on the test you want to run, you may need to define some other variables that are specific to your board or the configuration of the filesystem on it. Please see Adding a board for detailed instructions and a full list of variables that may be used on the target.
the Jenkins interface [edit section]
See Jenkins User Interface for more screenshots of the Jenkins web interface. This will help familiarize you with some of the features of Jenkins, if you are new to using this tool.
Troubleshooting [edit section]
If you have problems installing or using Fuego, please see our Troubleshooting Guide